
|
draw ‘til you’re soreWelcome to the bog of Jessica Amber. Herein you’ll find my life, whatever Irandom stuff ’m getting up to. It’s usually creative.
Unmaintained since 2019. Please go to www.jessicaamber.com.au This site contains affiliate links.
|
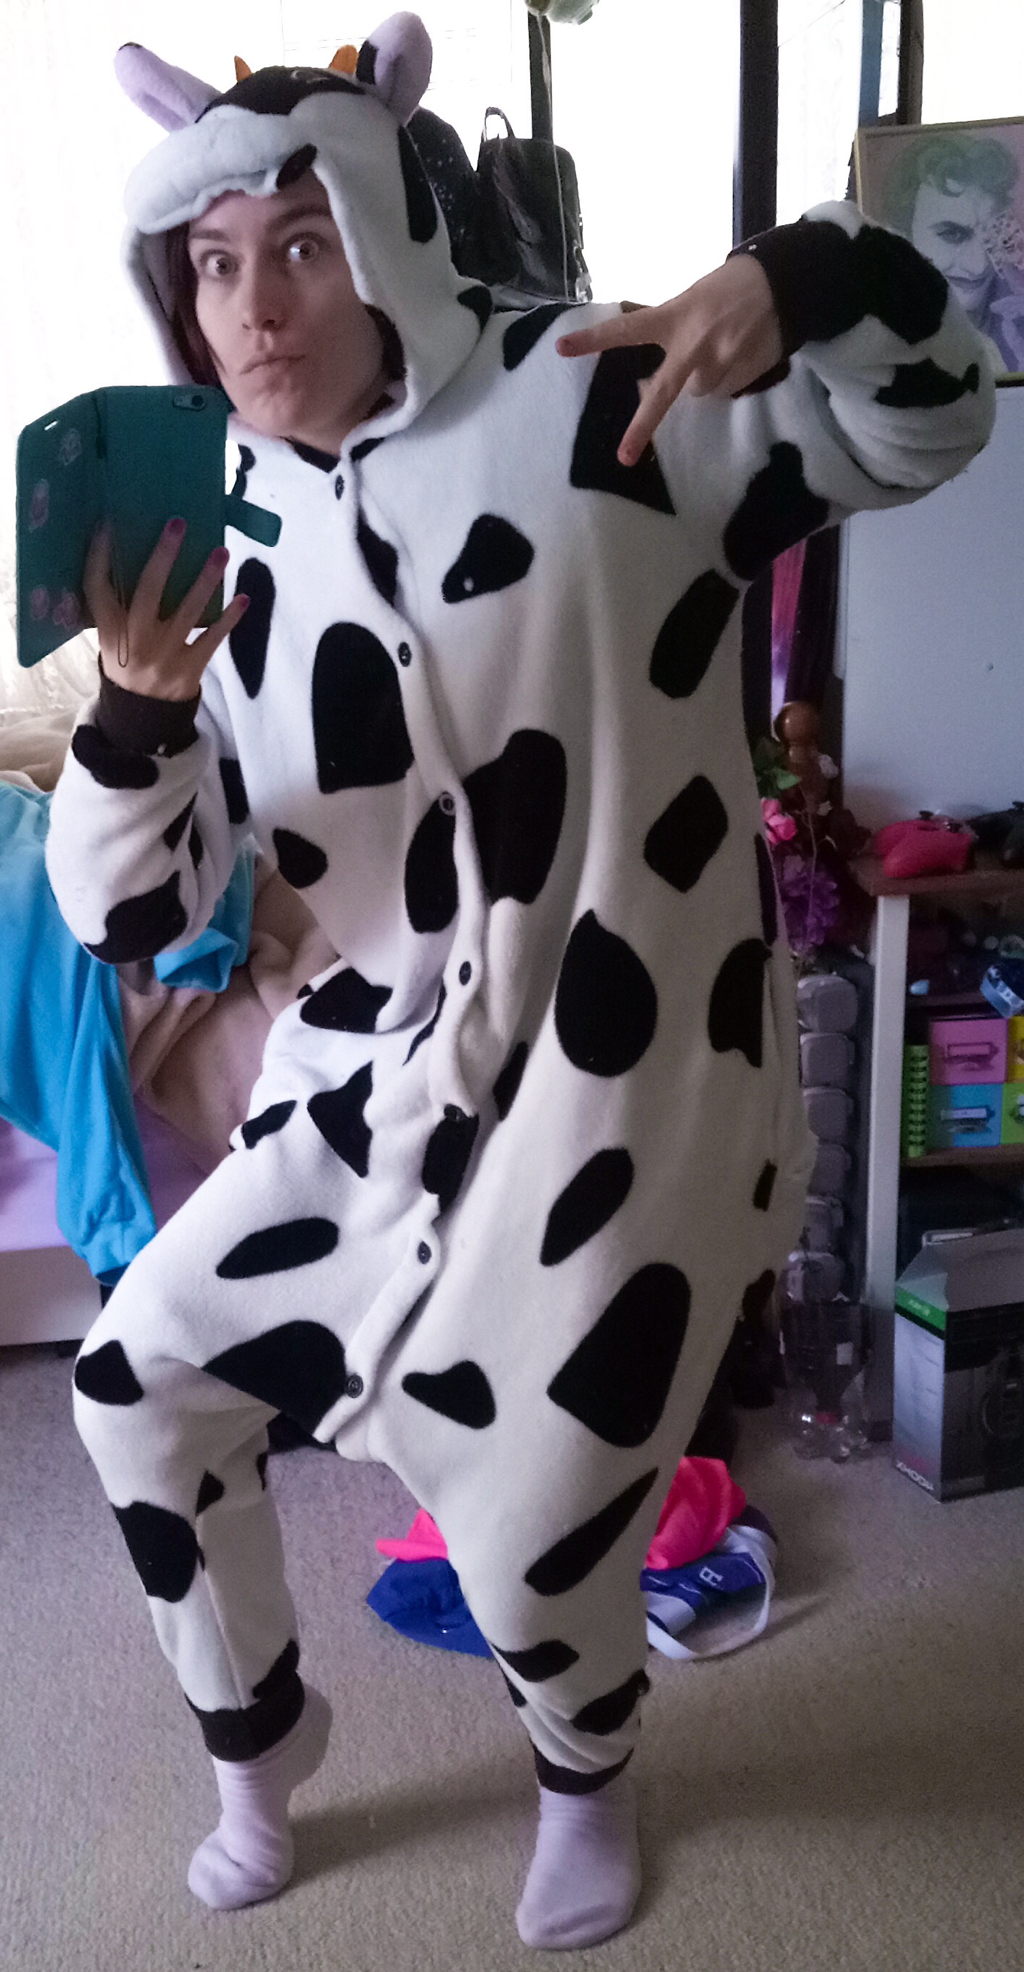
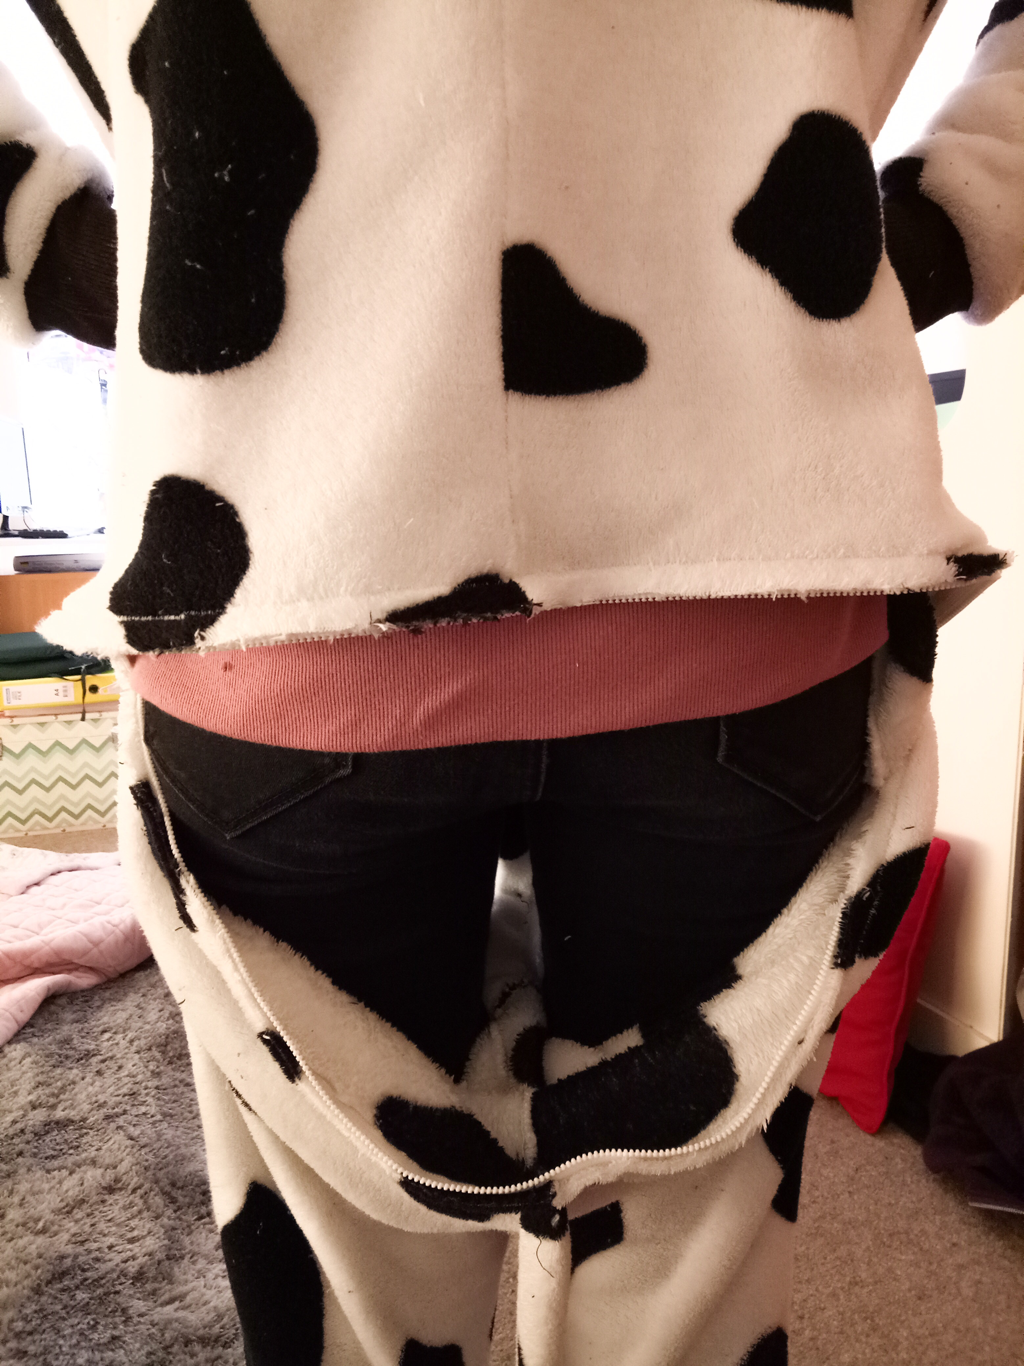
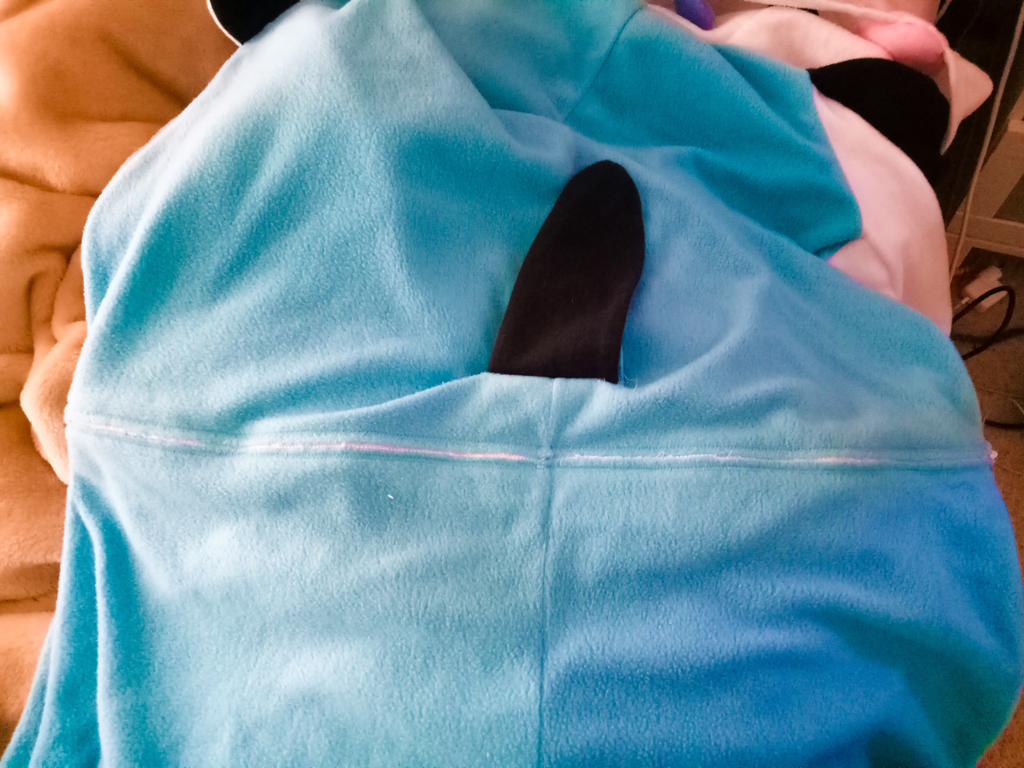
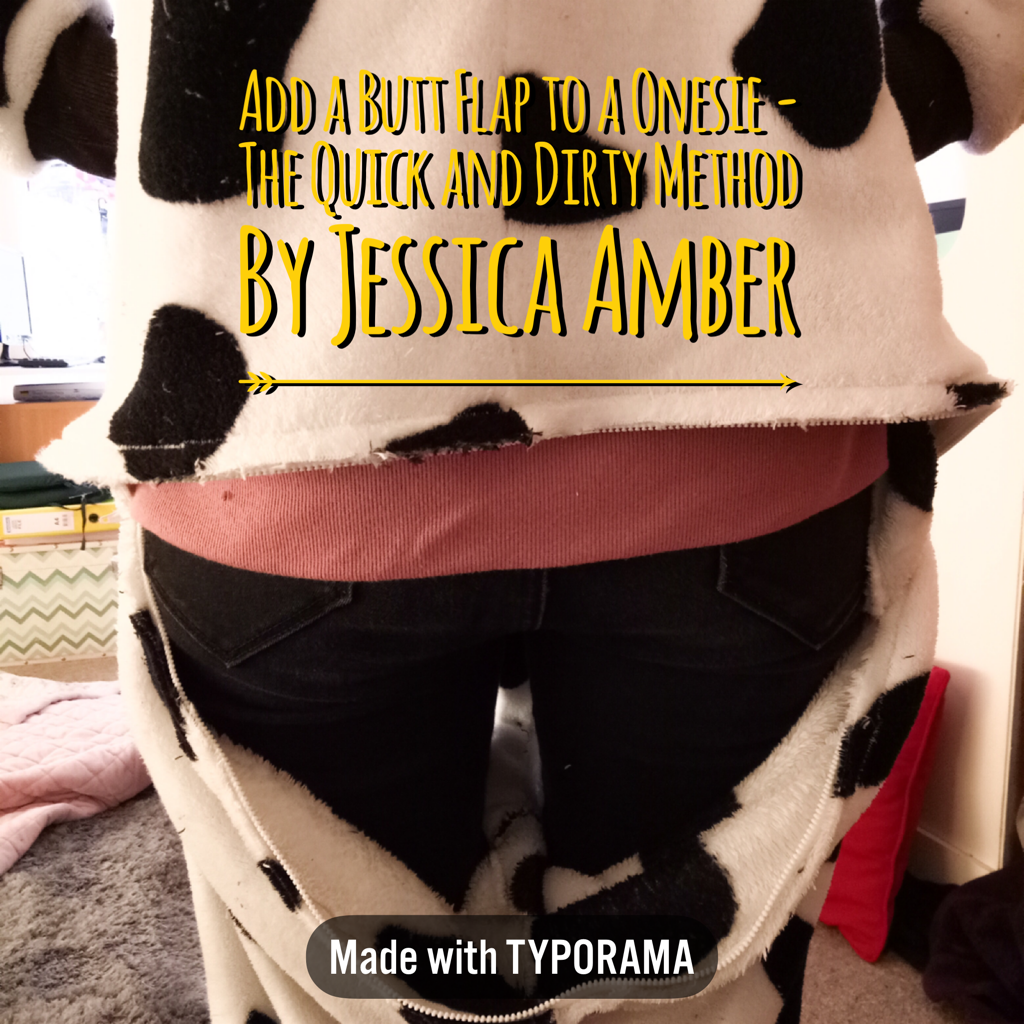 I like onesies in the winter. The heat of my body stays nicely insulated, and there are some cute as f designs these days (google 'kigurumi' if you don't believe me). The cheapest way to get onesies is through Ebay or Aliexpess, and I've indulged in some that way, but the only downside is, you can't always make sure it has a butt flap. And I'm the type of person who NEEDS a butt flap, for bathroom purposes. It is so not fun pulling the onesie all the way off in the winter just to use the toilet. So, here's the quick and dirty method I developed to add a rear exit on a typical onesie. No overlocking, no seams, no complex measurements, no extra fabric needed! I've used this method on a budgie and a cow onesie, and so far it's held up well. So, without further ado, let's get started!
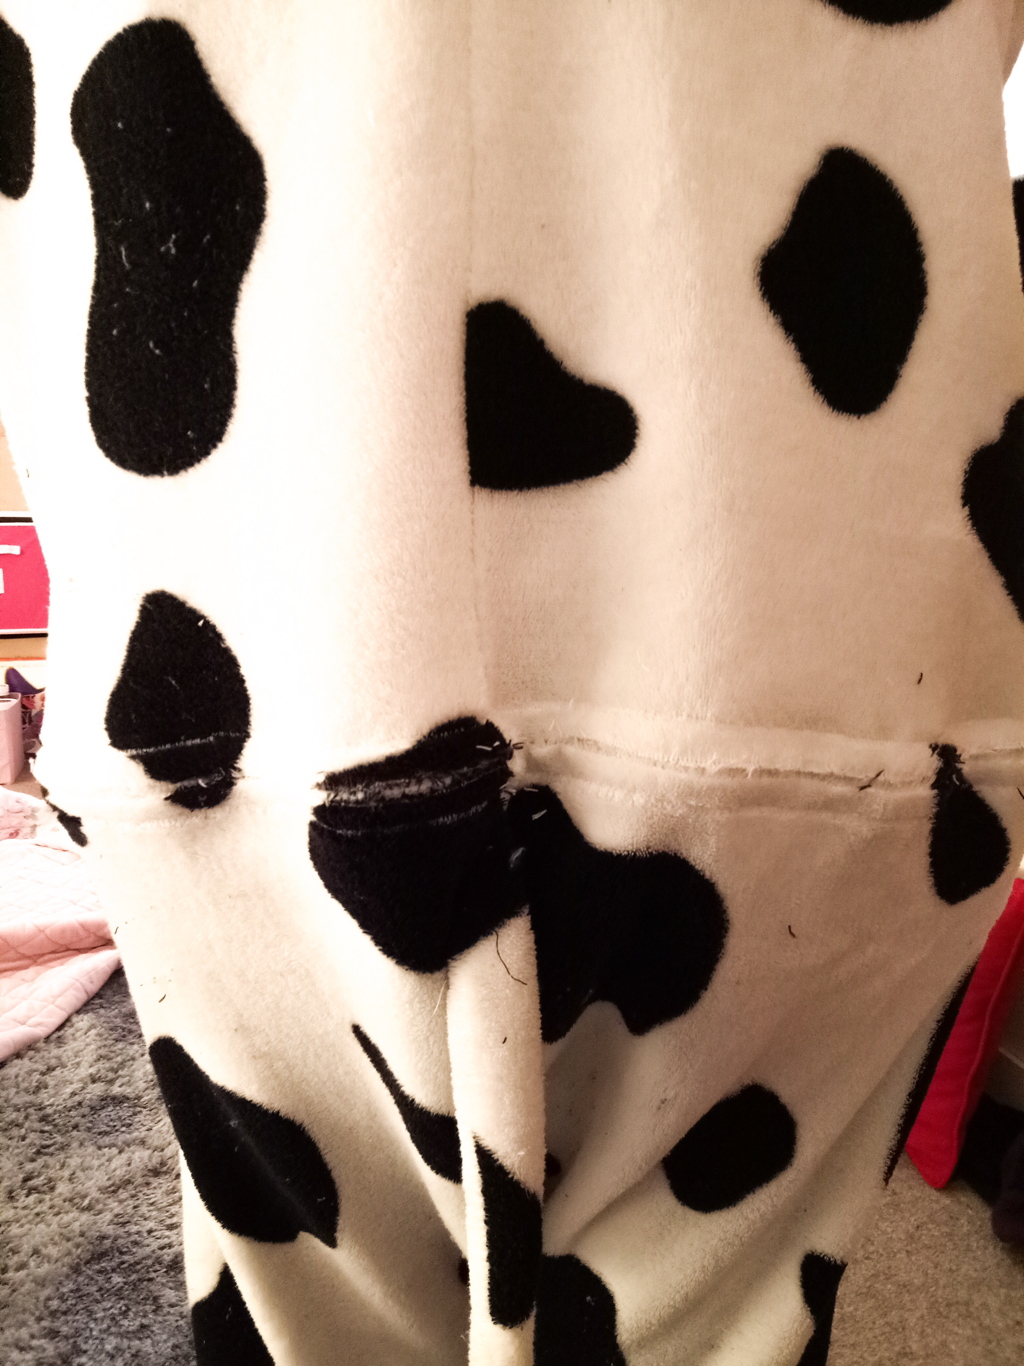
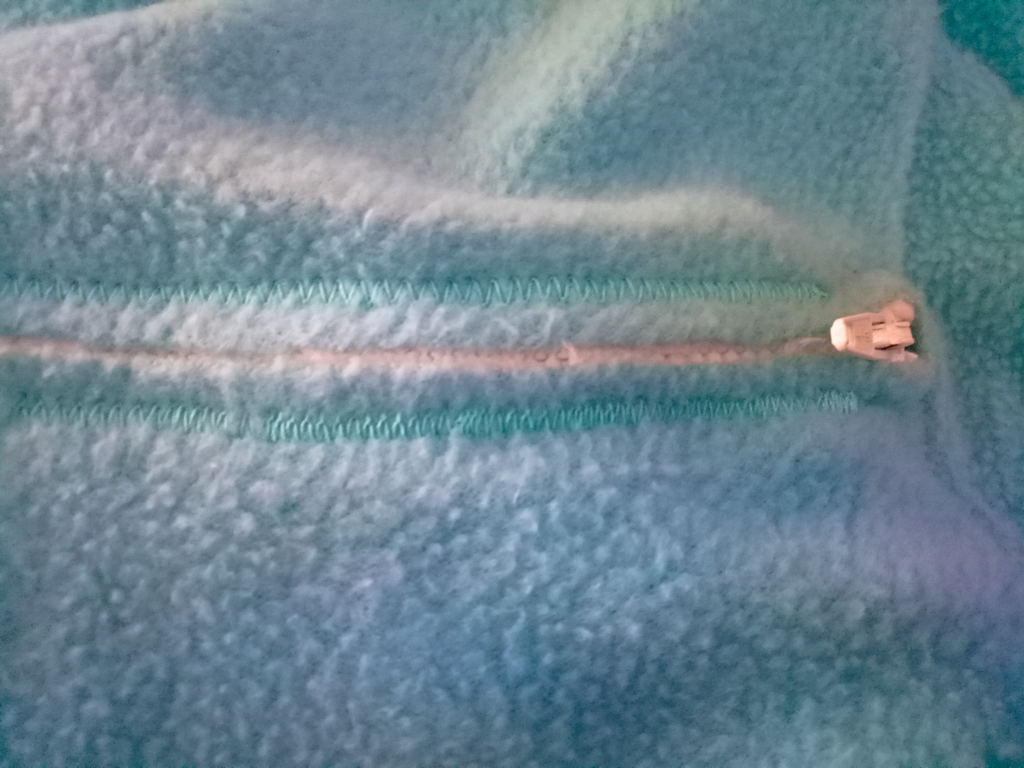
Materials Needed1. Onesie 2. Sewing machine 3. Thread in a colour matching the onesie 4. A long zipper in a colour matching the onesie 5. A zipper foot for the sewing machine 6. Hand needle 7. Scissors 8. Interfacing (depending on fabric) 9. Sewing pins Step 1Put on your onesie and consider where you want the zipper to go. The ideal position is around the end of your tailbone or start of your butt crack. It is more convenient if you place it above the tail on the onesie, if there is one, otherwise you'll always have to hold it out of the way when you go to the toilet. (I made this mistake with the budgie one) Step 2Take off the onesie, turn it inside out and lay it down with the back facing you. If your onesie material is thin and/or fragile, now might be a good time to add interfacing. For the cow onesie I didn't use any, but for the budgie, made of a somewhat thin fleece, I was advised it would be a good idea. I used some iron-on interfacing. It worked well, except for one problem, which affects step 6. The incision made at that step needed to be made through the interfacing too, which was difficult, and bits of interfacing were more likely to snag in the zipper. So I suggest if you choose to use interfacing, make a cut where the zipper teeth will be before attaching the interfacing. Step 3Pick out a zipper that is at least as wide as the onesie from sideseam to sideseam. Definitely don't go shorter because then it won't fully let your butt out. And preferably choose a zipper that is very flat and has plastic teeth. This is so it is more comfortable to sit in, and plastic doesn't get as cold as metal. Lay it puller-side down on the onesie where you want it to go. If the zipper is longer than you need, place it so the puller end is in the exact right spot and let the other end hang off the edge. It is much easier to shorten the non-puller end. We will shorten the zipper in Step 5. Pin the zipper in place. 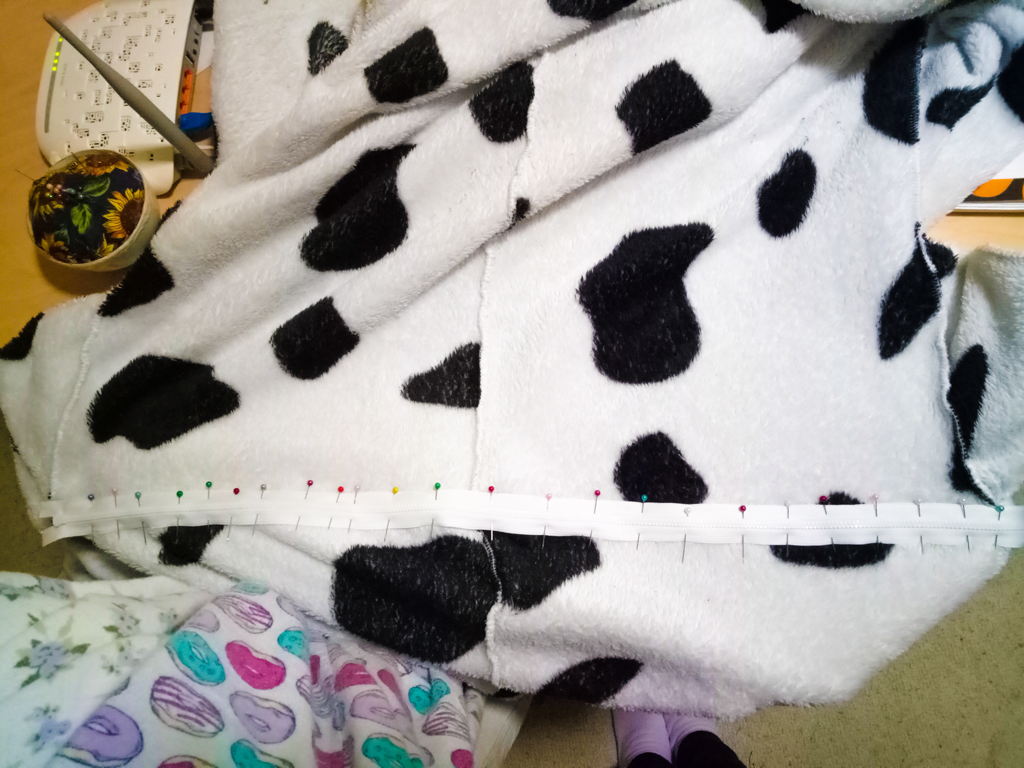 To make sure you don't accidentally pin the other side of the garment, you could insert something solid and flat between the layers. I used a clipboard, but you could also use a plate or a thin book. Also, make sure you don't pin down the tail on the onesie, if it has one, or place the zipper in a spot where it will cut the tail. Step 4Set your sewing machine to do a zip zag stitch with a long length and short width. I had my machine set at: Length: 1.2 Width: 5 Tension: 1.8 And attach a zipper foot to the machine. Sticth along the fabric edge of the zipper, always keeping the edge of the zipper foot pressed against the zipper. I sewed one long side, cut the thread, then did the other long side, but if you're more confident using the machine you could do it all in one go. 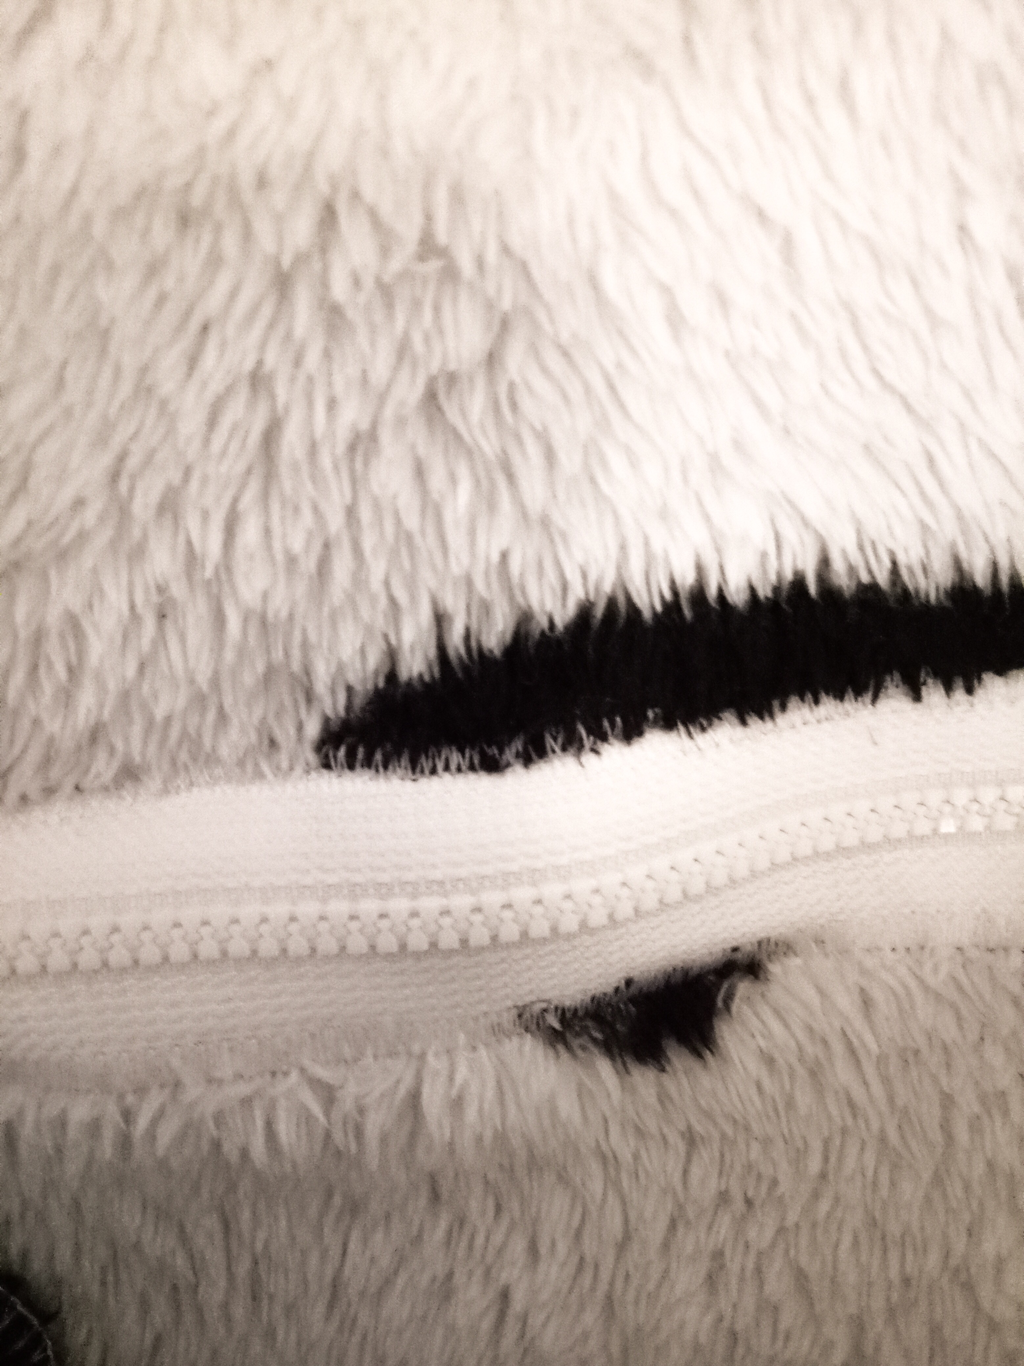 Step 5If you sewed as I did, now handstitch the short ends of the zipper, doing a similar length and width to the machine zig zag. 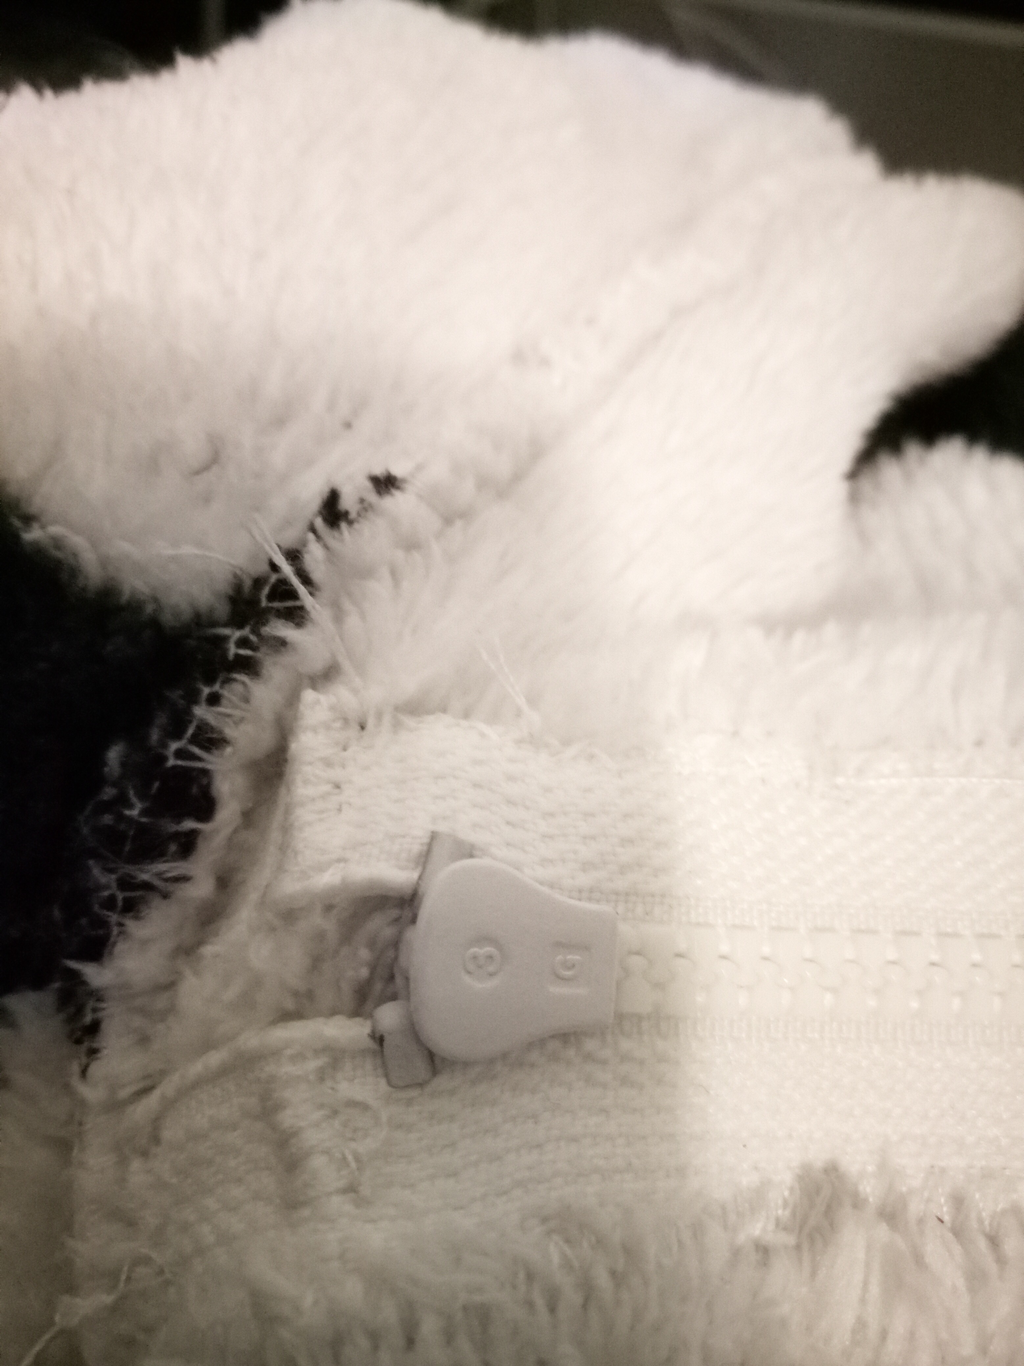 If your zipper was longer than the onesie, secure the teeth where you want the zip to end by doing many stitches over those teeth, then cut off the zipper about 1.5cm after thapt mark and sew the raw edges down. Step 6Turn the onesie right-side out, with the butt again facing you. You'll see a zip zagged rectagle where the zip has been secured. 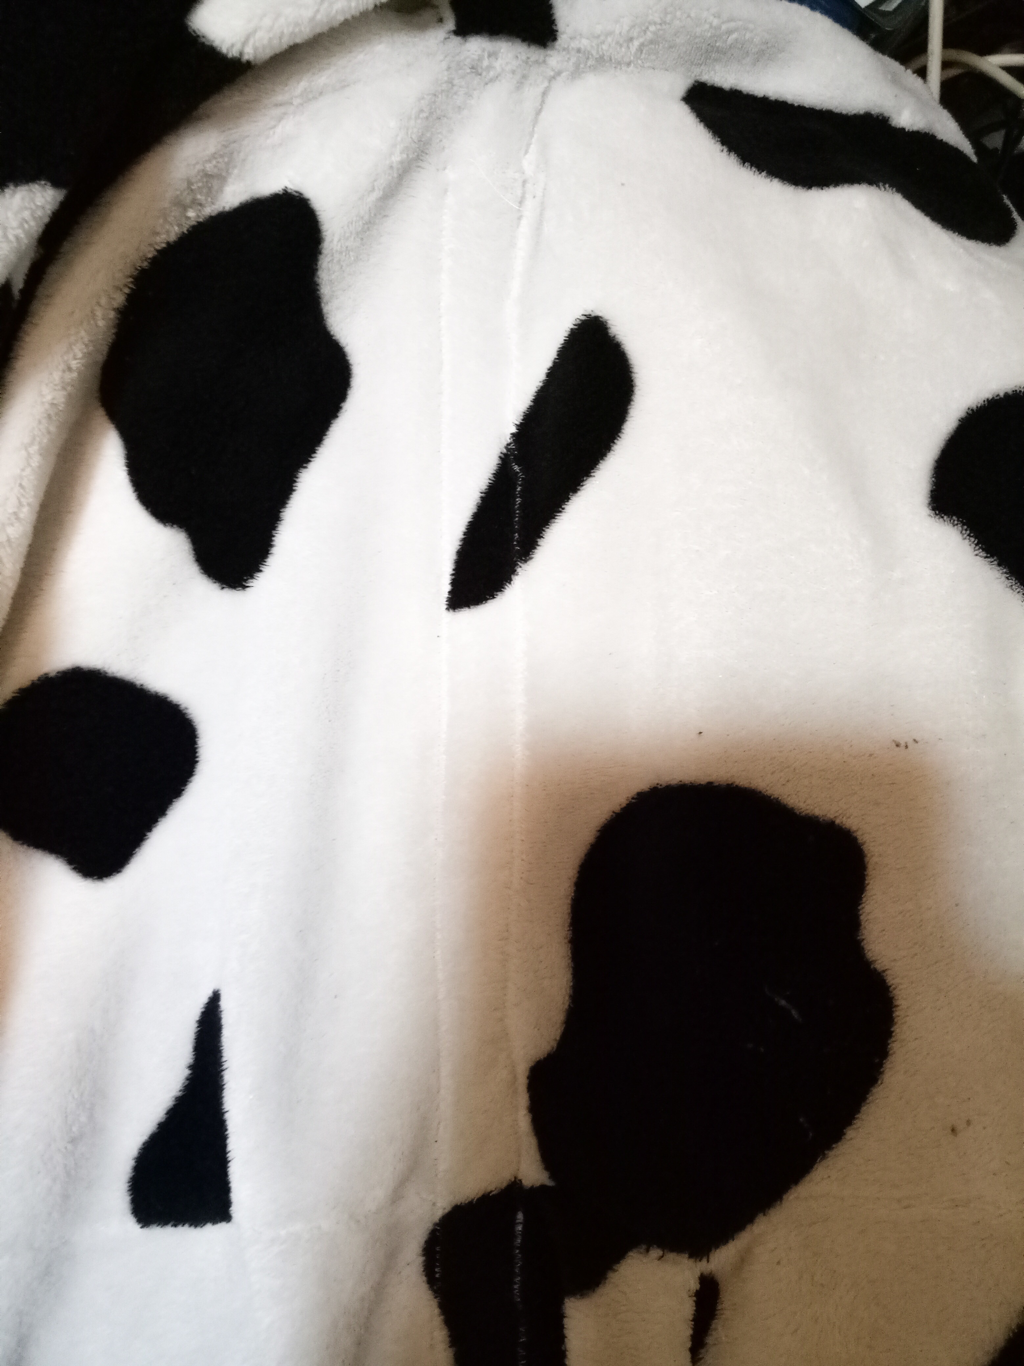 Make a small incision within this rectangle, stick your scissors in it and cut a long line to reveal the zipper. 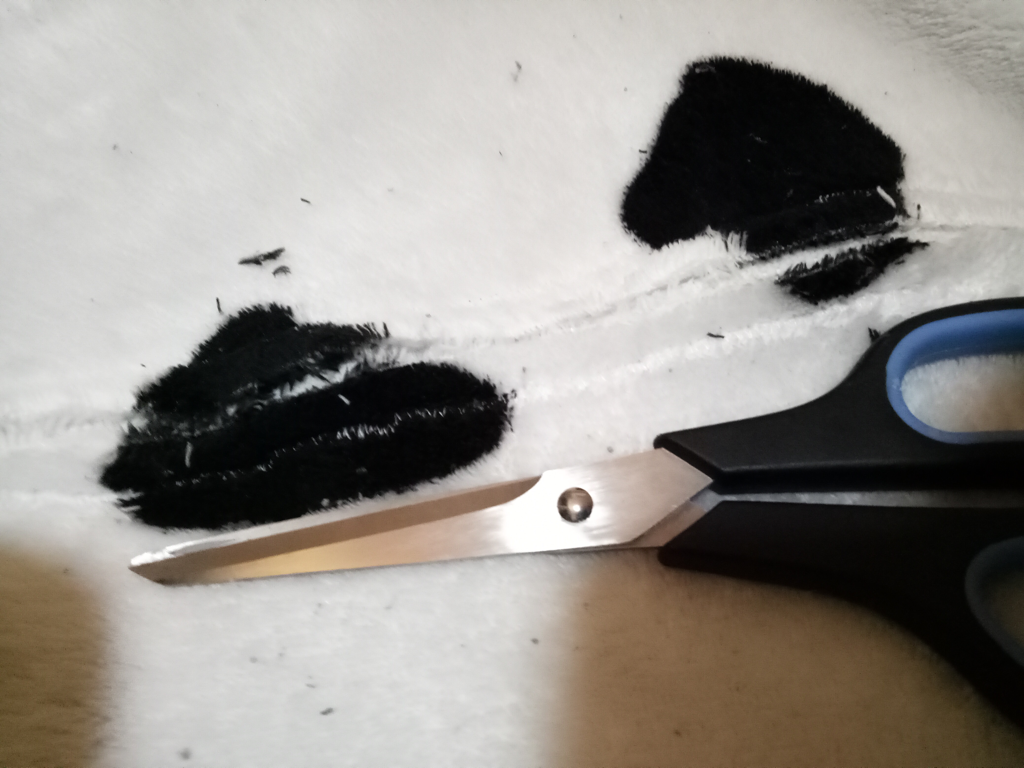 If your fabric is hairy or fluffly like mine, it will shed a bit along the cut, so brush that off. You're Done!Try in your awesome butt flapped onesie!
Test the zipper. If it snags at all, just cut away a bit more of the fabric. And here's a couple of photos of the zipper I added to my budgie onesie:
2 Comments
Mary
10/11/2022 05:22:31 am
Wow. I just got a onesie free as a welcoming gift for a clothing subscription. It is soft, fuzzy and the most comfortable thing I've lived in. The only thing I dislike is getting naked (almost) to use the bathroom. I came upon your page with these instructions after searching for a way to make a butt flap, and super happy I found this! I'm not confident in sewing skills currently, but with my mother in law's help, I think I may have a butt flap yet! Thank you!
Rosalind Gutsell
26/10/2023 06:02:23 am
Thank goodness for your butt zip idea.I tried velcro but omg it's scratchy and doesn't seal up properly couldn't wait to get my onesie back off. Leave a Reply. |
AuthorI'm just some Aussie 20-something year old with a lot of time and a lot of interests. Archives
July 2019
CategoriesAll Art Art Freelancing Business Cosplay Food Law Of Attraction Makeup Organizing Sewing Shopping TAFE Technology Web |

 RSS Feed
